skip to main |
skip to sidebar
This morning I got up early and put in some time on the Stairmaster. Not my favorite activity, but as the Alpine Class approaches, I am feeling a bit unprepared for the summit. Putting one foot in front of the other, over and over and over and over- a seemingly endless climb. It was only 20 minutes - then on to another 40 on the elliptical for cardio. In addition to getting my training out of the way for the day, I also had time to think about new recipes.chicken curry - fried rice - breakfast couscous - bean salad - sausage gravy - chipotle lime corn - minestrone soup - - -I promptly went home from the gym and had breakfast. Then got out my food dehydrator and dried some veggies for my next recipe.If I had known ten years ago how easy and cheap dehydrating my own food was, I would be an old pro by now. Instead, I am still experimenting with different foods, dehydration times and what I like. Some foods dehydrate better than others, and some change enough that personal preferrence comes in to play. You may like tomatoes - you might not like dehydrated tomatoes. 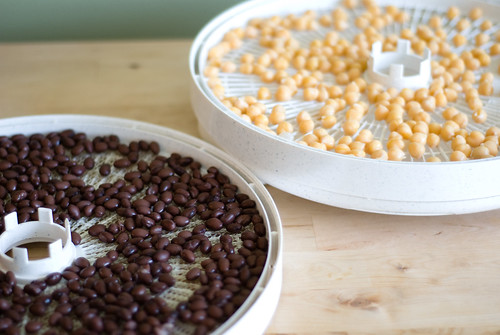 There are tons of books on food dehydration and you can read about it endlessly on the internet - in fact there is so much out there that it can be overwhelming. Here are a few resources I think are pretty helpful. Choosing a Food Dehydrator Dehydrating Meat And a few tips to get you started.1. Buy a food dehydrator that comes with screens, fruit roll sheets, and can handle additional trays. The screens make sticky foods easier to remove and also work well for smaller foods like herbs, beans, and ground meat. Don't be fooled by the name - fruit roll sheets can be used to dehydrate spaghetti sauce and salsa!2. Don't try to dehydrate all the ingredients in your recipe the first time. Pick one or two ingredients to experiment with and buy the rest. This way, if they don't turn out (or you don't like them) you don't have to start from scratch.3. Rehydrate your experiments before you head out on the trail! Some things rehydrate better in recipes or on their own. Test them out before you get in the woods.
 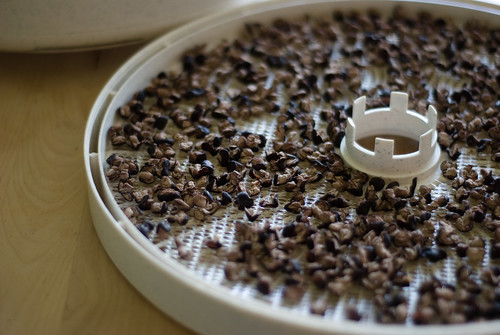 4. Blanch most vegetables before dehydrating. Asparagus, broccoli, carrots, corn, eggplant, potatoes,etc. I cook onions before drying them since raw onions make me a little sick.5. Start with beans and/or salsa. These two things are super easy, dry fairly fast and can be used together in a recipe. Canned beans and a jar of non-junky salsa can be dried at the same time on the same setting. The beans will finish drying before the salsa - just remove the tray and let the salsa finish.
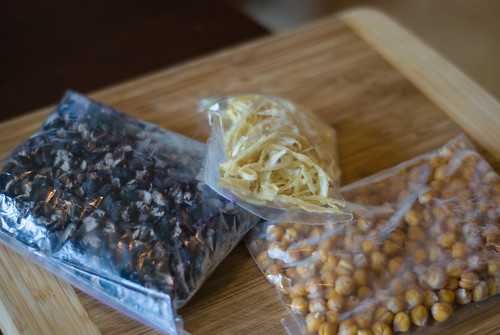
In August, my husband and I are taking an Alpine climbing class through the American Alpine Institute - which finishes with a summit of Mt. Baker. While we have been backpacking for more than 10 years, we have never climbed a mountain before. Last week we received our itinerary, packing list and reccomended training schedule! I have many things to purchase and rent, and a whole lot of training to do. As part of our preperation, I have planned to work on some new recipes.Since backpacking is one of the only places I think I can manage to eat biscuits & gravy one hundred percent guilt free - I have decided to add it to the menu for this adventure.On Sunday, I took my new biscuit recipe out to the test kitchen - Castle Peak (up at Donner Pass).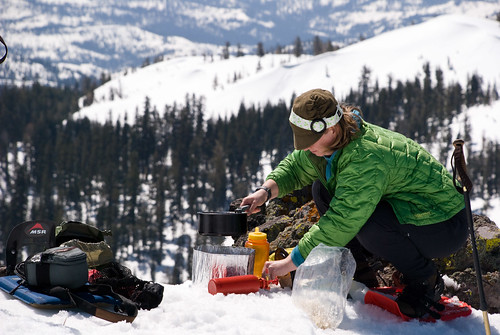 My test kitchen is at 8,320 feet. On what I call "lunch rock" about two-thirds of the way up to Castle Peak. We have been out on this snowshoe trek three times this year, and this is the first time we made it all the way to the top. I am pretty sure it was the biscuits that sustained us.
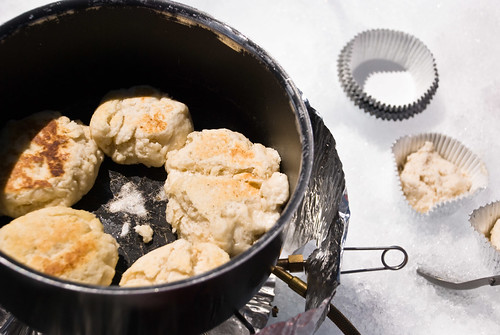 I read up on backcountry baking, most of what I found online involved baking instruments and contraptions - which I wanted to avoid. I also wanted something that was easy to clean up and did not create too much waste that I would eventually have to pack out. This is a pretty standard biscuit recipe, with the baking powder adjusted for the elevation. Powdered milk is substituted for the real thing, and water is added on the trail. These biscuits are a bit on the savory side, since I intend them to go along with sausage gravy in the near future. Backcountry Biscuits - Makes 12 biscuits2 cups unbleached flour1/2 cup powdered milk3 tsp baking powder1/2 cup all vegetable shortening1/2 tsp salt1/4 tsp fresh ground pepper1 cup water1 Tbsp olive oil - or olive oil packet1 ziploc bag - gallon sizeMedium-size cook pot with lidAt home:Add flour, milk, baking powder, salt, and pepper to ziploc bag.Add shortening to bag and work in to flour mixture with handsPlace olive oil packet or sealed container of olive oil in ziplocSeal ziploc bag, removing as much air as possibleWrite "1 cup" on bag with a sharpieOn the trail:Remove olive oil from ziploc bag and pour 1 cup of water into bag and seal.Massage the outside of the bag, working the water into the flour mixture until a thick dough forms. Set aside.Rub a small amount of olive oil on the bottom and half way up sides of pot. Place pot on lit stove.Rub a small amount of olive oil on your hands and reach into the bag and grab a golf ball size amount of dough. Roll dough quickly in your hands to form a ball. Press ball between your hands to make a patty.Place biscuit patty in pan. Continue until bottom of pan is full. Place lid on pan and cook on medium heat until the bottom of the biscuits are brown and dough has begun to rise.Flip biscuits with a fork or spoon and place lid back on.Cook biscuits until second side is brown and crisp.Remove from pan and repeat process with remaining dough.Serve with jam, butter or gravy.
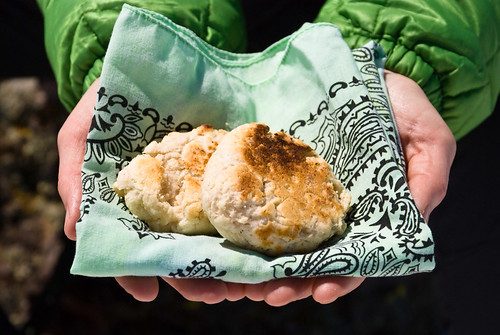
I came up with this recipe for our honeymoon trip through the wilderness in Olympic National Park. It was the beginning of August, but spring was just beginning to bloom. We hiked the High Divide trail for five days. Cold nights, lots of bugs, and a little bit of rain. All the flowers bloomed in the five days we were there. We were blessed with a wide variety of wildlife - all coming down from the hills to munch on the spring greens. Elk, goats, bears, and marmots were just a few.

It was definately a memorable trip - and not just because it was our honeymoon. Cold mornings beg for hot breakfast - something warm in your hands and in your belly to make that pack seem less heavy and help you put one foot in front of the other till the sun warms your skin and the blood starts flowing.

If you are on a multi-day trip, I reccomend having these more than one morning - you will be wishing you did.
Bacon & Chedder Grits - Serves 2
2 packages instant grits
4 pieces bacon*, cooked
2 Tbsp chedder cheese powder
2 tsp onion powder
1 tsp garlic powder
1/2 tsp black pepper2 sandwhich size ziplock bagsAt home:Empty packages of instant grits into each ziplockDice the cooked bacon and divide among the ziplock bagsAdd 1 Tbsp of cheese powder to each bagAdd 1 tsp of onion powder to each bagAdd 1/2 tsp garlic powder to each bagAdd 1/4 tsp black pepper to each bagWrite 1/2 cup H2O on each bag with a SharpieSeel bags, compressing as much air out of them as possible.On the trail:Boil 1 cup of waterPour grit mix into insulated mugs with lidsDivide water among mugs, and stir.Place lids on mugs and let sit for 7 minutes.Stir again, and enjoy!*You can use bacon bits instead of fresh bacon in a pinch, but it is not as good.


