Wednesday, December 12, 2012

Gluten Free Energy Bars

The usual energy bars, no matter how good, can get old after awhile.  This recipe, modified from a great blog - Kumquatblog.com, are great for a snack on a day hike, or you can enjoy them at breakfast on the trail.  The mashed bananas and coconut oil keep these bars moist like a bread instead of dry like a cookie.  You can change up the fruit and nuts depending on your preferences. They should keep, wrapped in parchment and sealed in a ziploc bag for about a five days.

Gluten Free Energy Bars - Makes 10
Modified from a recipe on Kumquatblog.com

1 1/2 cups gluten-free rolled oats
1/2 cup unsweetened coconut flakes
1 tablespoon flaxmeal
1/2 teaspoon salt
3/4 cups coarsely chopped pecans
1/2 cup dried currants mix
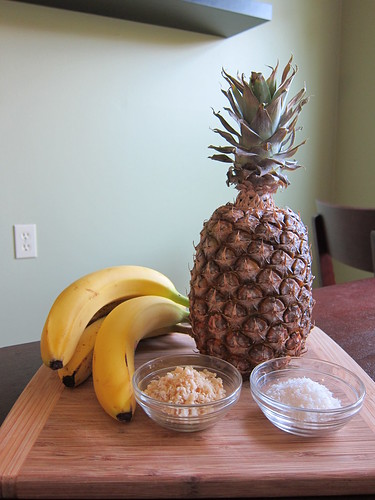
3 very ripe bananas, mashed
1/4 cup coconut oil
1 teaspoon orange zest
1 teaspoon agave nectar
1 teaspoon vanilla extract
Parchment
Plastic wrap
Cooking spray
Cooling rack
Cookie cutter or other mold (I used a small square container).


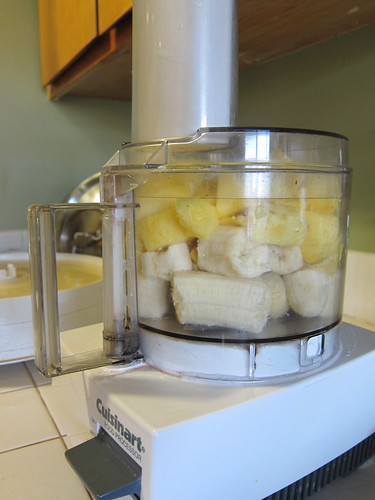
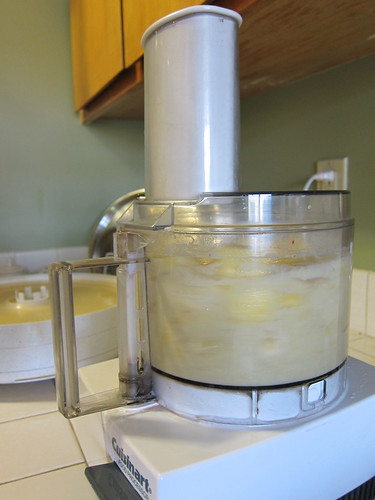
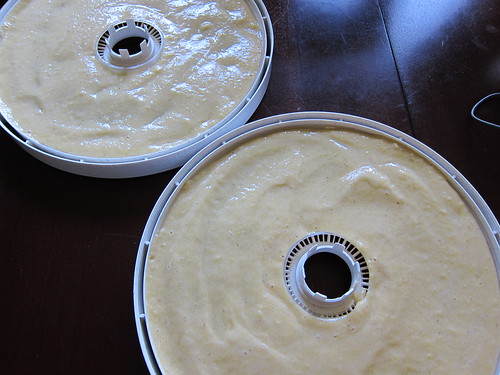
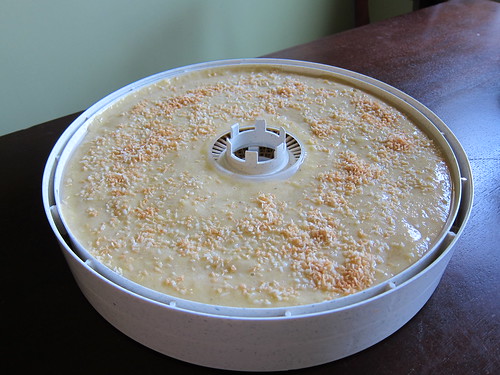
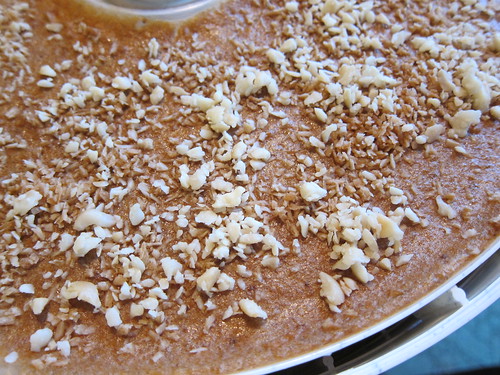
Preheat your oven to 350°. Combine oats, coconut, flaxmeal, salt, pecans, and currants in a bowl. In a separate bowl combine the mashed bananas, oil, orange zest, agave nectar and vanilla until well combined. Mix the wet ingredients in to the dry.  

Prep a cookie sheet with cooking spray.  

Press a small amount of the mixture in to your cookie cutter or other mold on to the cookie sheet. Continue with remaining mixture. Bake at 350° for 25 minutes or until golden and edges begin to crisp. Remove from pan and cool on a rack.

Yield: about 10 bars.


Saturday, June 2, 2012

Recipe: Shepard's Pie

taaaasty! For the last two summers B and I have been spending our big vacation getaway taking Alpine Climbing classes from the American Alpine Institute up in Washington State. We learned ice walking, crevasse rescue, multi-pitch climbing, basic navigation, and we summited two peaks! Those vacations were, for me, working vacations. Spending so much time pushing myself beyond my limits is exhilarating and exhausting. 

That is why this summer, I voted for a long, but familiar type of outdoor adventure: a 10 day backpacking trip in King's Canyon. I have never been to King's Canyon, but have been on muli-day backpacking trips more times than I can count. I am looking forward to the long days of walking, sleeping out of doors, and eating delicious food!

I have a few of my old favorite recipes that I will make like Pasta with Meat Sauce, Thanksgiving Dinner, Breakfast Burritos but I also want to bring along a few new recipes, including some new meals for breakfast and lunch.  Jerky, commercial energy bars, nuts & dried fruit can get pretty boring after several days.  And it is a challenge balancing the amount of calories you need each day with the amount of food you can carry.  

Because of these limitations, I've been focusing most of my energy on dinner recipes including this new one:  Shepard's Pie.  It incorporates some of my staples - dehydrated ground beef and instant mashed potatoes.  I've also developed a new "leather" for this recipe made from wine, tomato paste and worcestershire sauce.  For this recipe you will need at least two pots and a stove that simmers (not a great recipe for the JetBoil).


Shepard's Pie - Serves 2
1 package instant mashed potatoes 
2 Tbsp tomato paste
2 Tbsp worcestershire sauce
1/4 cup red wine
1/2 lb ground beef - dehydrated*
3 Tbsp beef bouillon
3 Tbsp carrots - dehydrated
2 Tbsp celery - dehydrated
2 Tbsp peas - dehydrated
2 tsp onion - minced, dried
2 thyme sprigs
Pepper to taste
1 package or 2 Tbsp parmesan cheese (optional)


At home:
Prepare the wine leather by combining the tomato paste, worcestershire sauce and wine in a pan.  Heat to a boil and set aside to cool.  Once cool, pour onto plastic dehydrator trays and dehydrate at 135 degrees until the mixture has formed in to a "leather" (about 4 hours).  Remove from trays and set aside.

While the wine leather is drying, combine the beef through the rest of the ingredients into a Ziploc bag and write 2 cups water on the bag with a sharpie.  Add 1/2 of the dehydrated wine leather to the bag.  


Untitled On the trail:
Prepare the mashed potatoes according to package directions in one pan and set aside.  Bring 2 cups of water to a boil in the second pan.  While the water is heating, remove the wine leather from the Ziploc and stir in to the water to dissolve.  When the water begins to boil, pour rest of mixture in and stir.  Bring back to a gentle boil.  Boil for 3 minutes, covered.  After 3 minutes, spoon prepared mashed potatoes onto top of beef mixture.  Sprinkle parmesan cheese on top.  Turn heat off, cover, and let sit for 7-10 minutes.  

It just occurred to me that I don't need to eat breakfast type foods for breakfast.  Shepard's Pie on a chilly morning with a cup of irish coffee might be a nice way to start the day!


*I dehydrate my ground beef with 1/2 cup of flour mixed in.  The flour dries on the beef, and when it is reconstituted later, makes a nice gravy.  If your beef does not have flour, you can add to Tbsp of flour to the Ziploc along with the rest of the ingredients.  You can also use a beef gravy packet instead of flour, but if you do, omit the beef bouillon from the recipe. 


Monday, May 28, 2012

Comfort Foods for Winter Camping

A few months ago, B went to Antarctica for school/work and while he was there he learned some snow camping and survival skills. We had been thinking about trying our hand at winter camping, and so his recent trip was the perfect motivator. After camping out in Antarctica, how bad could the Sierras be?
Untitled
We went out to our usual spot at Castle Peak in Tahoe. 

While we were packing up in the parking lot, we ran in to two of our friends who were heading out for a day trip. We were able to spend a gorgeous day with them. At mid-day they headed back to the car, and we set out to find our winter camp spot. 

The meadow and our camp

Once we found our spot, we began setting up camp. I learned just how much work camping in the snow can be. You have to trample down the snow to make firm ground for your tent. Then you have to dig trenches for your tent stakes. Then you have to stake everything down again. It is strenuous and tiring, but it feels good to keep moving because the alternative is to freeze.
Cynja in the kitchen
Every time I head out on a camping trip I am reminded by how much free time our creature comforts allow us. Just the day-to-day tasks of feeding, housing, cleaning and keeping yourself safe in the back-country takes a good majority of your time. In between those tasks you get to travel a bit. When I come home, everything seems so effortless, and luxurious. It makes it easy to appreciate what you have. 


Even though we were camping in the spring, I thought the cold and snow called for comfort food. Something warm and filling like mashed potatoes and gravy. I settled on a trail version of a classic Thanksgiving dinner. Back when we first started backpacking together, I would make something similar but use instant stuffing like stove top, a packet of instant gravy and instant mashed potatoes. We've come a long way in the last ten years!
IMG_1010
The quantities for the stuffing below make 4 servings. It will last for a few months in an airtight container. 


Thanksgiving Dinner - Serves 2 
2 cups whole wheat bread crumbs (preferably homemade) 
1/4 cup dried mushrooms 
1/4 cup dried carrots 
1/4 cup dried celery 
1/4 cup dried pear or apple (optional) 
3 Tbsp dried onion 
1 Tbsp chicken bouillon powder 
2 tsp dried garlic 
2 tsp dried parsley 
1 tsp ground sage 
1 packet olive oil 
1 packet instant mashed potatoes 
1/2 lb ground turkey - dehydrated 
1 instant gravy packet* 


At home: 
Put the bread crumbs through sage in a Ziploc bag. Write "1 cup water" on bag with a Sharpie. Put olive oil packet in bag. Set aside. 


Put dehydrated turkey and contents of instant gravy packet in separate Ziploc bag. Write "2 cup water" on bag with a Sharpie.
IMG_1026
Pack turkey mixture, stuffing mixture and packet of instant potatoes together. You will also need 2 insulated mugs, and two insulated bowls, or three cook pots. 


On the trail: 
Bring 1 cup of water to a boil. Divide stuffing mix between two insulated bowls. Divide the boiling water between the two containers. Stir both, cover and let sit while you make the potatoes. 


Prepare the potatoes according the package directions. Make in the insulated mugs, or one of your cook pots. Note: you will still need to boil more water after this step. 


Bring 2 cup of water to a boil. Stir in turkey mixture and simmer for 2 minutes. Turn heat off, cover and let sit for 10 minutes (or until turkey is soft).
IMG_1031
Add your mashed potatoes to your stuffing mix, and pour half of the turkey gravy mixture over the top. Do the same for the other serving and enjoy! 


IMG_1032


*To skip the instant gravy packet, you can dehydrate your ground meat tossed in 2 Tbsp of flour. Bring along a packet of bouillon or (liquid chicken broth concentrate) too. On the trail, pour the bouillon in the hot water, and stir in the meat. It will reconstitute with a gravy.
view from the kitchen

Tuesday, May 22, 2012

Basics: Pineapple Banana Fruit Leather

You can make fruit leather out of almost any kind of fruit, and different fruit combinations. Some fruits require that you cook them a bit first, but most can be dried fresh. If you choose to dry your fruits fresh, be sure to pick in-season, ripe fruit.  You can always add sugar to taste.  This is a great recipe for home or on the trail -  school lunch or summit adventure. I have added coconut and macadamia nuts for added calories (needed in the backcountry).  If you are eating at home, consider skipping these for a lighter snack.

IMG_1220 

Pineapple-Banana Fruit Leather - Serves 4
4 cups bananas 
2 cups pineapple, diced 
1 Tbsp fresh lemon juice 
2 Tbsp Macadamia nuts, toasted and chopped 
2 Tbsp shredded coconut, toasted

IMG_1221 

At home: 
Peal bananas and break apart into chunks and add to food processor 
Add diced pineapple and lemon juice. 
Blend until you have a smooth paste.

IMG_1223


Spread paste out onto dehydrator plastic trays. 
Make sure the paste is spread evenly.

IMG_1225

 Sprinkle each tray with 1 Tbsp of the shredded coconut.

IMG_1228

Place trays in food dehydrator and dehydrate at 135 degrees (or fruit setting) for about 8-10 hours. Set a timer to check the trays every hour or so after the 6th hour to make sure your leather is not over-dried. When the leather begins to become sticky, sprinkle each tray with 1 Tbsp macadamia nuts.

IMG_1230

Remove leather from trays and wrap tightly in plastic wrap, or tear in to small pieces and seal in Ziploc bags.
Your leather should keep for about a week.
Eat as a snack, or tear small pieces up and add to plain oatmeal or grits for breakfast.  

Wednesday, March 7, 2012

Thai Lunch at Mount Tallac

IMG_0987-2

We had record amounts of snow last year. This year, not so much. The lack of snow has kept B and I from getting out to the mountains as much as we would like. It has also slowed down my motivation to design new camp meals. But with the renewed goal with S to finish our cookbook in 2012, and a 7 day backpacking trip to King's Canyon this summer, I have finally found the incentive (and excitement) to get back in the camping kitchen.

Our trip out to Mount Tallac on this gorgeous sunny day was a lazy snowshoe trip. Both B and I were recovering from a week-long flu. Even though we didn't climb to the summit, we got some much needed fresh air, vitamin D, and a new recipe to add to the upcoming cookbook.

This recipe is traditionally served at breakfast in Thailand, and S says she had it every morning with a mango smoothie when she visited. I think this would work nicely as a backpacking breakfast as well, especially on chilly mornings. You can even serve it with a few pieces of dried mango for a Thai-like breakfast.

Khao Tom Moo (Rice Soup with Pork) - Serves 2

1 bunch celery - dehydrated
2 Tbsp Magi seasoning
2 Tbsp fish sauce
1/4 tsp white pepper
1/2 tsp galangal powder
8 oz ground pork, cooked
1/2 cup instant white rice
1 clove garlic - minced
1 Tbsp olive oil
2 Tbsp cilantro - dehydrated
1 package instant chicken broth or concentrate
White pepper to taste


IMG_0993-2

At home:
Mix the cooked ground pork with 1 Tbsp of Magi Seasoning and 1 Tbsp of fish sauce. Dehydrate according to your dehydrator's directions. Here are some tips for food dehydration.
Divide dehydrated pork, celery, and rice into two Ziploc bags.
Add 1/8 tsp white pepper and 1/4 tsp galangal powder to each bag
Seal bags and write 2 cups water on each bag

Heat olive oil in a pan over medium high heat. Add garlic and cook until brown. Let cool. When cool, put garlic and olive oil in a separate Ziploc bag.

Add dehydrated cilantro to a third Ziploc bag.


IMG_0996-2

On the trail:

Put 2 cups of water in a JetBoil or pan.
Heat to almost boiling and add instant broth and 1 package of pork/rice soup mix.
Bring to a boil and simmer for 5 minutes.
Turn off heat and let sit for ten minutes.
Empty garlic and oil in to cup or insulated camp bowl. Make your own camp bowl
Pour soup over garlic and stir.
Sprinkle dehydrated cilantro on top.
Sprinkle with white pepper to taste.
Enjoy!

*If you plan on eating this meal on your first or second day out, try bringing fresh cilantro and garlic and prepare on the trail.

IMG_1000-2

Sunday, September 4, 2011

Instagram Ramen

A few months ago B and I took a mini climbing vacation. I had just gotten a new job, and had only three days off between the last day at my old job and my first day at my new job. I still wanted a break...something to signify the change. A short rock climbing trip out to Owens River Gorge did the trick!


In addition to some rest, relaxation, and super fun sport climbing, I also got to try out a new recipe: Pork & Vegetable Ramen, and my recently downloaded Instagram
App. The last three photos are courtesy of B and the originals can be found here.

Owens River Gorge is a steep 10 mile long canyon on the eastern edge of the Sierras. People say it is one of the best sport climbing destinations in the US - but I have not been to a lot of sport climbing destinations so cannot validate this, however, it certainly offered the most accessible amount of climbs in one location I have ever experienced. I could climb for years here and never get bored.

BlogMix

The weather was overcast and a bit windy, but it never rained on us, and the temperature was perfect for climbing. At midday, I was thankful for the hot noodles and coffee we brought with us. A little salty broth, long noodles, and the fresh flavors of veggies made for a mentally and physically fortifying lunch. Even if you are just out for a day at the crag, it is sometimes worth it to bring along the JetBoil and a hot lunch.

This recipe is quick and easy and relies on instant ramen as the base. Most instant ramens are pretty high in salt and lack any real nutrition or substance. I found some high quality baked ramen noodles at Ranch 99 Market
and fortified them with dehydrated vegetables and ground pork. The result ended up being a success. So good in fact that we have tested it with friends on a backpacking trip and it went with us on our Alpine Climbing class this summer.

If you are not in the Bay Area and do not have an Asian grocery close by you can find them online here.

Pork and Vegetable Ramen - Serves 1

1 package instant pork flavored ramen (look for high quality brands at Asian markets that are baked, not fried)
1/4 cup dehydrated ground pork
2 Tbsp dehydrated carrot
2 Tbsp dehydrated celery
2 Tbsp dehydrated cabbage
1 Tbsp dehydrated green onions
1 packet soy sauce


At home:
Put all the ingredients in a Ziploc bag and write 1 1/2 cups H2O on the bag with a sharpie.

On the trail:
Bring 1 1/2 cups of water to a boil. Put noodles and vegetable/pork mixture in boiling water (reserve season packet and soy sauce). Boil for two minutes. Poor boiled noodles into an insulated bowl and stir in seasoning packet*. Let sit for 5 minutes. Add soy sauce to taste. Enjoy!


*Adding the seasoning at the end will keep your jet boil or pan from becoming greasy and pork flavored - if you do not mind this, you can add the seasonings at the same time that you add the noodles and vegetable/pork mixture like I did in the pictures.

You could vary this recipe by adding the following: dried shiitake mushrooms, seaweed, dried shrimp, or you can use BBQ pork instead of dehydrated pork on the first or 2nd day out. If you try some other additions be sure to let me know!


Monday, March 14, 2011

A Change In Plans

On Sunday, B and I headed out to South Tahoe to try and get in one last snowshoe trip of the season. We had been sick with the flu and colds for most of February and were really feeling very angsty about the need to get out. We planned on hiking up Pyramid Peak - but the route turned out to be too melted out already. We drove back and forth along Highway 50 looking for a spot with enough snow to begin. All we found was dense brush and light snow. Finally, we headed down in to Tahoe proper as it began to rain. We sat in a parking lot and tried to think of an alternative. With the cold raid beating down on the car, it seemed like maybe we would have to turn back.

stormy Tallac

I sat in the car as B looked at maps on his iPhone and researched alternate trails.
It seemed like such a waste to drive all the way out from the East Bay and then just turn around again and go back. It also seemed like a bad idea to do something that was unfun and unsafe just because I was too pig headed to accept my circumstances.

As I learn more about mountaineering and alpine climbing, I realize that I need to learn when to change my plans. I need to learn when to turn back, go a different way, admit defeat, evaluate, and let go of my expectations. I thought about the quote I read from a guide who had just led a team of Everest, "going up is optional, coming down is mandatory."

As the wind blew outside the car, I thought about the day when I would face having to turn around - possibly after flying half way across the world and climbing 2/3 of a mountain. I would have to be OK with it. Maybe today could be a day I practiced that skill?

"I found a hike we can try," B said.
"Where is it?"
"Mount Tallac. Just a little ways down the road."

It could be more of the same. It was raining. It was windy.

"Ok," I said, "let's go check it out."

As we drove to the new trail-head, I wondered if I was making a mistake. I told myself we should at least check it out, and I promised myself if I felt any twinge of "bad idea" I would tell B we had to turn around. As we pulled in to the snow park lot, the rain stopped. We got out of the car and geared up. We decided to follow one of the cross country ski trails and use the markers would keep us on route.

20110313-20110313-IMG_0262

We got about 15 minutes out and the sun broke through the clouds. I went to put my sunglasses on. I had left them in the car. This sucked. I did not want to have to go back, it looked like we were really going to get a trek in despite our late start, and I really wanted to have a new blog post.

"I don't need them."

"Yes you do. We are going back."

"Uhg. Ok."

We headed back to the car, got my sunglasses and then, as we started off again, noticed a nice snowshoe track heading the opposite direction we had originally chosen. We decided to follow that trail instead. It turned out to be the best change of plans we had made in a long time. We found a new training hike for our summer mountaineering class, a new snowshoe route to share with our friends, and I got to test a new recipe out in the wild.

20110313-20110313-IMG_0239

We ended up hiking the trail to Mt. Tallac. Even though the wind blew, the weather was warm, and we had some beautiful views when the clouds cleared.

20110313-20110313-IMG_0244

The wind blew too hard along the ridge for us to sit and take a break. We ate snacks quickly on our feet and kept moving. I decided we could test the stew recipe on our way back to the car, back down in the aspen groves.

We got back to the groves around 2:30pm. It was the first time we had sat down all day, and it felt good to be out of the wind.

B started up the JetBoil and I took the insulated camp bowl and stew mix out of my pack. B poured the stew in the boiling water.

20110313-20110313-IMG_0268

I stirred it for two minutes while it boiled.

Stew!

I poured the stew into our insulated camp bowl, then we let it sit for about five minutes.

tasty lunch

B took the first bite. "How is it," I said.
"It is a keeper." B said, as he ate a few more bites. I had a few too.

20110313-20110313-IMG_0283

The warm hot stew tasted so good after being in the wind all day. It warmed our hands, and our bellies. We both felt revived, and I felt a little redeemed. For what I am not sure, maybe for staying flexible all day? I had been willing to keep changing my expectations - and somehow it felt like I had been rewarded for the effort. Hopefully you can enjoy this recipe under less trying circumstances.

This recipe was a long time in the making. It requires that you make a leather out of a homemade stew base and dehydrate some vegetables in advance.

Beef and Vegetable Stew - Serves 1

1/4 cup freeze dried roast beef
1/4 cup freeze dried potato dices
1/4 cup dehydrated veggie mix*
1/4 dehydrated Homemade Stew Leather
1/2 Tbsp beef bouillon
1 tsp dried oregano
1 1/2 cup boiling water

At home:
Put all ingredients in a Ziploc bag. Write 1 1/2 H2O on the bag with a Sharpie.

On the trail:
Boil 1 1/2 cups of water in a pot or JetBoil. When the water begins to boil, stir in the stew mix. Let the stew boil for two minutes, stirring the entire time. The stew will thicken as it boils. After two minutes, pour the stew into an insulated mug or camp bowl. Cover and let sit for 5 minutes. Check the consistency. If veggies are still a bit stiff, put the lid back on and let sit for another 3 minutes. Add salt & pepper to taste. Enjoy!

*If you don't have time to dehydrate the vegetables, you can buy Just Veggies instead.

20110313-20110313-IMG_0279


Boork and Totoro