Last weekend S and I got together to make insulated bowls for the recipes we are preparing. I have made these before for several trips. S is planning all the food for an upcoming trip to Utah and asked me to show her how to put them together.
You can easily buy insulated mugs and bowls at stores like REI or online, but I have found that they are often too small for the recipes I create. I have been experimenting with the JetBoil lately and creating recipes that require no cooking. The insulated bowls work really well for these types of recipes. If you are simmering recipes over a stove and serving them in bowls, these may be more than you need.
Insulated Camp BowlsMakes 2
2 2-cup plastic containers with screw top lids (Ziploc brand work the best)
1 cheap foam camping sleeping pad
1 roll of duct tape
Sharpie or other marker
Scissors
At home
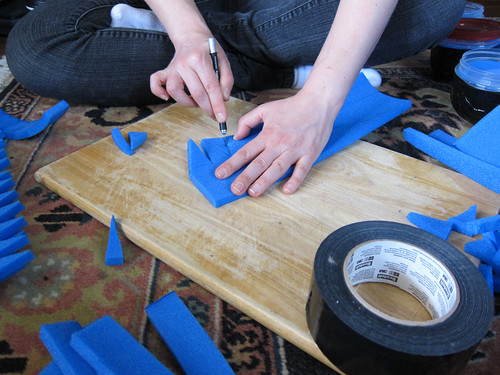
Start by cutting a piece of the foam pad to fit around container. To do this, wrap the pad around the container, mark where the sides meet, and cut the pad at this mark. You will have one piece of pad that you can then cut several strips from for several containers.
Next, you will want to cut a piece that will fit the height of the container, as well as wrap under the bottom. To do this, place your recently cut piece up against the container. Mark where the container begins to sharply curve on the foam. Measure one inch beyond this and mark the foam again - one inch below this portion of the container. Repeat this process to make two fitted strips of foam - one for each plastic container.
You will want the foam to curve around the bottom of the container so it is insulated as well. To do this, you will need to cut triangles out of the foam along the bottom edge. Cut triangles that are about 1/2 inch apart and 1 inch deep all the way across. Remove these pieces of foam and discard.
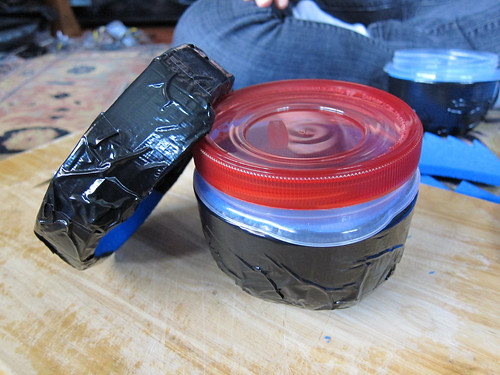
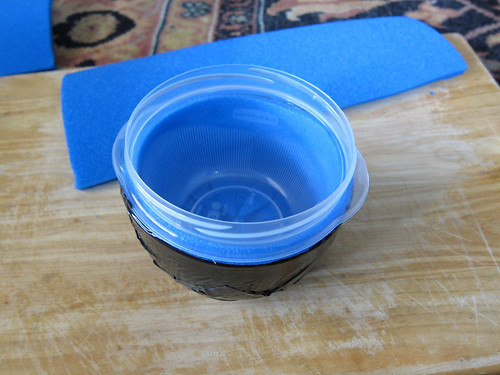
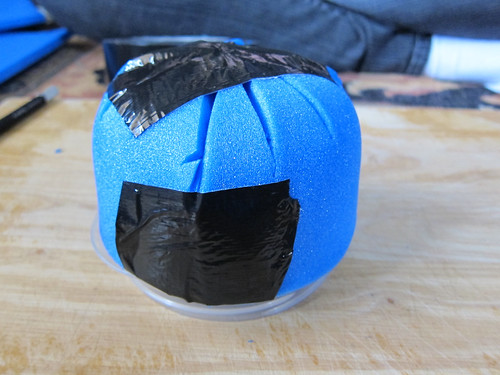
Now you are ready to assemble! Grab the duct tape, one container and your piece of foam. Wrap the foam around the container and secure the edges with duct tape. Put a few more pieces over the joining edges until they are covered, and the foam is securely wrapped around the container. It should stay on by itself. If it does not stay on, undo the tape and adjust until it is snug.
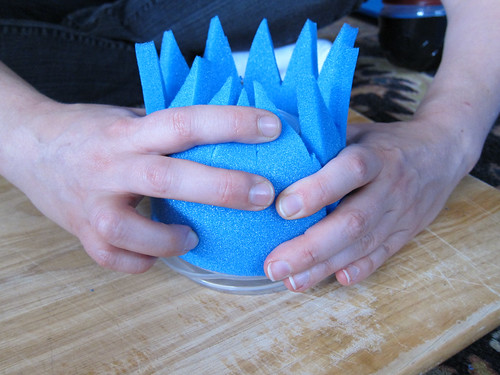
Once you have your foam secure on your container, turn the container upside down, with both hands bring the triangle edges together until they wrap over the bottom of the container and meet in the middle. Hold these pieces together with one hand while you place a piece of duct tape over them with the other. Wrap more pieces of duct tape across the bottom to secure the triangles in place.
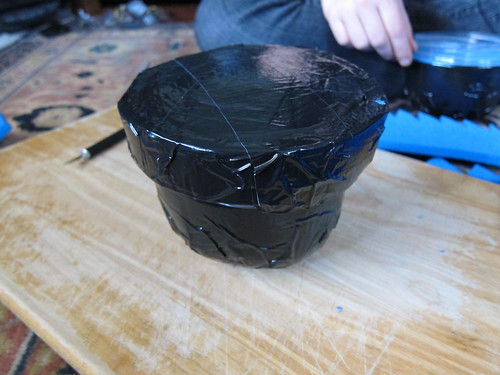
You can also make a lid for your container. If you are going somewhere cold or winter camping, I recommend the lid. To make a lid, cut a circle out of the foam about 1/4 inch larger than the widest part of the new foam covered container. Then cut a 1 inch wide strip that is long enough to wrap around the circle. Wrap the 1 inch strip around the circle and secure with duct tape. Tear of multiple pieces of duct tape and wrap the over the lip of the 1 inch foam strip, across the top of the circle and secure on the other side. Crisscross the new "lid" until it is covered with duct tape.

No comments:
Post a Comment